Showing posts with label Design. Show all posts

Sunday, 3 April 2016

7 Simple Steps To A Really Beautiful Blogger Blog


For those of us who don't really like spending money on our blogs, achieving a beautiful Blogger blog without breaking our banks is always a task that intimidates. It's tough, because if you don't have the skills, the time, or the brain power to make the big tweaks, your blog will more than likely look like almost every other Blogger blog out there, and that's the one thing you don't want happening.

I've always been a Blogger user, and as far into the future as I can see, I will continue to be, but that's because I know the system, I know how to make it do what I want, and I know what I want from it, but for those just starting out and wanting to stand apart from others doing the same, there's a few simple things you can do to achieve a really beautiful Blogger blog, in no time at all.

1 | Upload a Favicon


I get really twitching when I land on a blog without a Favicon. That's not to say that it's a big issue, but it certainly goes a long way in showing you want to make an conscious effort in promoting yourself when somebody isn't on your open tab, rather than Blogger.

"Erm, Amanda.. what is a favicon?"

Check out your open tabs at the top of your screen. You see how your Twitter tab features it's iconic blue bird, or how Buffer has it's branded logo? Those are favicons. They go a long way in creating a consistent brand across the board, but they also instantly make you look so much more professional. It's the reason I have lil' Nellie sitting pretty when you've got my blog open in your tabs.

Saturday, 27 February 2016

10 Colour Palettes Inspired By Young Adult Book Covers (+ How To Create One in Picmonkey!)


Colours are vital when it comes to designing, well, anything and everything. Different colours affect people in different ways, as does their shades and tones, it's all about colour psychology, and what emotions or messages those colours evoke. Take Nellie for example. Grey is quite a calm colour, that gives on the impression of composure and relief, but it can also be an emotionless colour, and doesn't tend to stimulate excitement or energy. Sure, the colour represents me in a huge way, but it can put people off.

If you're not confident in your colour scheme, you're never going to be comfortable.

I've read quite a few interesting posts in finding the right colour scheme or palette for you and your blog/business, and it feels as though everybody and their uncle is creating Pinterest boards for absolutely everything, but for me, I find book covers inspiring in terms of colour schemes and moods. The right colours partnered together can stimulate a whole collection of emotions and feelings, either pulling me towards or pushing me away from picking it up, and rightly so, that's what colour does.

I've put together 10 different colour schemes, all inspired by, or based on book covers, each with their hex colour codes so you can start to create amazing things with those you most like, and at the end, I'll be showing you how to create your own, so stay tuned for that.

Thursday, 25 February 2016

How To Prepare For Photography Photo Shoots in 3 Steps (incl. 50+ Cheap Prop Ideas!)

Ah, photography, both the bane and the beauty of the blogging world. People love them, but most people despise taking them. It's not the actual clicking of the camera in the process, it's the staging, the look, the feel, the overall execution of how it looks against your other images. Put bluntly, it's all about the aesthetics, and that's a problem, because many of us just can't do it. It doesn't have to stay that way for long, as with preparation, planning and attention paid to the time and weather, (yes, the weather!) you can get yourself all set for a really good photo shoot.

First though, you need to prepare, and that's where these steps come in..


1. Decide on photoshoot layouts in advance


I quite like coming up with different shoot ideas days in advance, which works in conjunction with my use of Lategramme to schedule those posts days, even weeks in advance. In terms of Instagram prompts, it's easy to prepare different shoots in advance for monthly challenges, so if you're looking to show off some rainbow books and want to get a few different options out of one shot, decide in advance what you want the main scene to look like, and the different ways you can shoot the scene, and incorporate it in others.

You could sketch out the scene you want to achieve, or even just make notes on the books you want to use, the shape or the colours you want to focus on, what the actual focus is, whether you want to soften the look, make it bright or bold, black and white, simple and whitespace, full to the brim, just having some sort of the idea on the kind of overall look you want before you even come to get started is always worth doing.

Thursday, 4 February 2016

5 Blog Graphic Styles You Can Create With Picmonkey (+ Showcase of Examples!)

You don't have to splash out cash on Photoshop, make these 5 attractive blog images with Picmonkey and never spend a penny again!

Blog graphics are super important. They play a huge role when it comes to your blogs design, but more than ever, they're extremely important for use in social media. A picture tells a thousand words, and when you're an introvert like me, that's not only clever, but a life saver. But a bad image can say just as much, if not more, about you, your blog, your brand, your business even, than a good one, and that's why creating the perfect blog graphic sounds tough. I'm here to tell you, it isn't.

I'm a sucker for an attractive image just as much as the next girl, but I'm so attracted to them, I've been checking out Pinterests vast collection of graphics to find you the 5 biggest and most popular styles around, and I'm going to show you how you can create them, completely free, no experience required, with Picmonkey, one of my favourite blogging resources I can't blog without.

The 'Say It As It Is' Graphic


This is without a doubt the easiest of blog graphics to put together. Simply open Picmonkey and choose your desired image size. I would recommend 4x6 or 5x7, but most definitely choose something has some length to it, you want your graphics to be tall rather than wide.

Monday, 1 February 2016

Why You Should Design Your Blog For Yourself First, and Everyone Else Second


Have you ever been to a special event, a family occasion, or even brunch with a significant other and put on an outfit that you didn't feel comfortable in? Maybe the dress was too tight, or the style a little off, or whatever you were wearing didn't fit, or the shoes were a little too - not you.

I have.

I went to my Grandfather's funeral in a suited-and-booted outfit that I hated. I felt uncomfortable. I felt like an impostor. I felt like I was lying to my Grandfather whom, as dead as he was, knew I wasn't being myself. I felt like I was lying to those around me, family and friends who knew the kind of person I was, the kind of person that doesn't wear a suit to a funeral. I felt like I was lying to myself.

Scratch that. I was lying to myself.

I was pretending to be somebody I wasn't because of tradition, because of the word of somebody else. I spent the day I was meant to spend remembering a great man whom I loved dearly, fidgeting with my outfit, nagging my Mother as to when we would be leaving, just so I could take off the stupid suit.

Dressing up your blog in a specific way because somebody else says you should is like going to a funeral in an outfit you would rather see burn alongside the coffin. Dressing up your blog in a specific style because one person says it's the 'right thing to do' is like covering up your body you spend 5 hours a day working on keeping fit because showing off some leg is some how taken as an invitation.

Designing your blog based on somebody else's idea of what your blog should be like, is stupid.

I spent a long time letting my stupidity rule the roost. In terms of design, I quite liked what I had, but it never felt entirely me. I felt like I was wearing whatever I wanted to that funeral, but still had on the suit jacket and shoes because it would have impolite if I didn't. God forbid I do something somebody else didn't like, or didn't enjoy, or didn't what to see.

Your blog may serve to help others, but it's you that serves them. You wouldn't stand on a stage reading a speech you didn't write nor believe in to people you wanted to respect you, so don't design your blog in a way that doesn't feel honest and true to yourself, and be disappointed when you're branded a fake.

It fascinates me that it seems to be the bloggers and business woman that teach other people that fall into the trap of being somebody they're not. Of all the people to succumb to the pressure, the people advising you, teaching you, showing you how to be the best you are should be the least likely, and yet I see it everyday. There is no denying a brand goes a long way in creating a solid foundation on which to launch anything, including just a 'blog' - but making it you is far more important.

Monday, 21 December 2015

5 Areas To Revamp Your Blog In For The New Year


New Year is the time when, whether we want to, or plan to, we start making changes. Changes to how we conduct our lives, what we do with our lives, what and who we put into our life, what our life will look like in a years time, and with our lives comes the things we do in them, and for me, that includes my blog.

While I'm making plans, goals and sorting myself out for 2016, I'm in the middle of making sure Nellie looks it's best when we get started again in January, and that means I've been doing a spot of revamping. If you're not sure what you can, and should be revamping, or at least touching up this year, take a look at the following list and see if there's anything you can do to bring your blog into the New Year with a bang.

1. Your About Page


Interestingly, my About Page is my 5th most visited page in the entirety of my blog, so it's pretty clear it's a very important aspect of Nellie and Co, and trust me, it's important in your blog too. Content is great, as is design, but getting to know the person behind the magic, the solo-multi-hat-wearer making the cogs turn, let's be real, it's something we all love to do, and your About Page covers that.

I very recently revamped my About Page after realising that it didn't coincide with what I had in mind for 2016. My previous About Page was much more focused on the books and the reviews, and everything else came second, whereas now, I'm much blogging focused, my content is so completely different to what my About Page claimed it was, and so a change was very much needed.

Make sure your About Page reflects what it is you, and your blog do for people. If you're still sporting information that's at least a year old, take a look at see if there's anything that can be altered or changed. Make sure that when people come to check you and your blog/business out, they have the updated, as of this moment edition, rather than the aging version of yourself.

Related: Don't Forget To Tell Me Who You Are On Your About Page

Wednesday, 25 November 2015

How To Create Content Upgrades and PDFs with Canva

You don't need to use Adobe to create your PDF files or content upgrades, you can use Canva instead. Check out the secret and how I used Canva to create a Goal Planner!

You've seen the new craze hitting the streets, the content upgrade advice, the 'grow your email' shouts that come with it, and yes, content upgrades can benefit your blog hugely, and they help grow your email list, but if you're anything like me, you're wondering 'how the heck do I do that Amanda?!'

The answer is simple my friend. Canva.


I've talked about my dear friend Canva before when I showed you how I create some of my blog graphics, but just when I thought this insane free resource couldn't get any better, it went and proved me wrong.

Most professionals you see creating content upgrades; worksheets, workbooks, planners and so on have one tool I, and you, most likely do not - Photoshop and Illustrator. I thought that because I didn't have these tools, I couldn't create something fabulous like that myself, but once I stopped wallowing and put on my big girl panties, I started looking for ways I could.

Enter Canva.

Canva not only allows you to create beautiful graphics for your blog, but it also enables you to create PDF documents, or at least download them for use either online or for printing. You can create any extra bonus document, worksheet, full-on workbooks for your blog to use as content upgrades and extras, and it never gets any more complicated than simply using Canva as you already do.

Monday, 9 November 2015

How Creating a Cohesive Design Kickstarted My Brand


When I first started out blogging, I wasn't interested in creating a 'brand'. Bah, I didn't even know what brand meant in terms of blogging, to me, a brand was the name of a company that sold or provided a product or service, such as Nike, Apple, Unilever or The Blue Cross. As far as I was concerned, I was just blogging, I didn't need a brand, right?

Wrong.

It matters not that you're just blogging, creating a solid brand is super important, and on the web, even more so. You may start out blogging for t' lolz and to kill poor old time, but give it time and you're likely to want to grow. You're likely to want to break out and get more pageviews, to ramp up those statistics and make all that effort, all that time, all that busting your ass off worth it, and when the world tells you a brand will help make that happen, it's right.

Related: Why Branding Matters
Related: I Care About Numbers, Is That a Bad Thing?

"But Amanda! I don't know where to start? Creating a 'brand' sounds scary, and expensive!"

You're right, creating a brand does sound scary, and it does sound a little expensive too, but there is a nice little nifty trick that can get you well on your way to a solid brand that looks the part and doesn't cost a bomb, unless you want to spend a few pennies, in which case, go for it. The trick?

A cohesive design can help create a solid brand


Wednesday, 21 October 2015

Where To Find The Best Free Vector Icons With Flaticon


A few weeks ago, I wrote a tutorial on how I create my graphics on Picmonkey, and it was met with great reception - something I'm extremely pleased about, especially as it encouraged a lot of other bloggers to open their minds and give it a try, with much success, but within that time, I've discovered a very special website that not only makes my design process on Picmonkey so much cleaner, easier and improves the look of my graphics, but also makes my creative heart sing.

Flaticon - the Only Icon Website You'll Ever Need!


Monday, 14 September 2015

How I Create My Blog's Graphics | Part Two: Canva

Canva is a great free blog image program, with its templates, easy interface, and oh, did I say free? Check it out!

A few weeks ago, I shared why graphics are really rather important when it comes to your blogs look and it's brand, and dished the dirt on how I create some of my graphics with Picmonkey, with a promise to share how I create my other graphics, those created on Canva. This is that promise my friends, and you definitely do not want to miss it. If you thought how I created my Picmonkey graphics was easy, wait until you check out Canva..

So, What's the Deal With Canva?


Well, much like Picmonkey, Canva is a free design resource, with the ability to buy extra features, but there is where the similarities tend to end. Unlike Picmonkey, Canva has over 40 different types of template size, all for different purposes, anything from the perfectly size Twitter Header, to Menu templates, to Blog Graphics (I know!). Within those different options, there are what feels like a never ending collection of actual design templates for you to try out and play around it, (although it's worth baring in mind that not all of those templates are free to use, so do be careful). You can choose from close to 1,000,000 (yes, a million people, it's worth counting the zeroes just to check) images and over 1000 different fonts, with clip art, icons, vectors and more available just be searching for it. Drag and drop, edit and upload, Canva is fabulous. Here's how I use it.

Monday, 31 August 2015

How To Revamp a Blog Without a Redesign (Infographic)


There comes a time when every blogger gets an itch that they need to scratch - the revamp itch. Something just doesn't look or feel right about your blog anymore, and you've got to switch things up. The first port of call? A redesign. BUT WAIT! A redesign is not the only way you can revamp your blog, and it shouldn't be your first option by all means. There are loads of ways you can revamp your blog or give it a spritz of something new, and a redesign should only really be your last resort. Not sure how you can revamp your blog? Here's 6 easy ways to bring something new to the table, without messing with your look all that much.

Wednesday, 26 August 2015

Should You Feature Recent/Popular Posts in Your Sidebar?


While typing up a previous post (it was 7 things I dislike about your blog, because I know you would have been nosey and asked anyway) I had a moment of flection on sidebars and it through me for a curveball. There are many different pieces of advice that people give you when it comes to your sidebar, but there's one that I see everywhere that I don't think makes much sense.

"Feature Your Most Recent Posts!" ..But, Why?


Wednesday, 12 August 2015

How I Create My Blog Graphics | Part One: Picmonkey

Starting out blogging, I was under the impression it was all about the content, and sure, content is key, it's one of the most common and popular phrases available to man, but 2 years down the line, like other things in life, blogging, and what works best when it comes to marketing and promoting, has changed. You can create some of the best content possible, you could have all the facts, all the figures, all the opinions, and lets face it, all the followers possible, but without something visual, you're lagging behind, and that's never a good thing.

Create something visual on your blog post is a sure fire way to get your post gaining more views. You might be ready to read for the long haul, but 90% of information transmitted is visual, and it's processed 60,000 times quicker than text. 40% of people respond better to visual images, and over 45% of people say design plays a huge part in the credibility of brands - all more than good enough reasons to consider using visuals in some way or another on your blog. Not only that, visuals are much easier and much more likely to be shared on social media, and with an accompanying image, your post can go from cold to behold.

So why do so many bloggers not use graphics?


They don't know how to. They don't know which programs to use, or better still, they've been brainwashed into thinking the only way to create great looking visuals is through Adobe, and sure, I can't speak for Adobe, I can't afford it and therefore can't use it, (Lauren at Elle and Company has a lot of tutorials for people more interest in the 'professional' graphics route) but there are so many other great options available for bloggers lacking design experience. Even better, there are programs available online, completely free, and I'm a passionate believer in getting what you can for free before going all out.

Photoshop? Gimp? Bah, here's how I create my blog graphics, completely free, with Picmonkey

I use two free image related programs: Picmonkey and Canva


Today, I want to focus on how I use Picmonkey to create my most commonly used graphics. Picmonkey is a free to use website that allows for collage creating, image editing and creating graphics for free, although for a monthly or annual fee, you can access further features such as extra fonts, better quality clip-art images and photo editing that enrich the users experience, although I personally know of a few loop holes to gain access to these free features in other third party ways, but that is for another day. For now, here's a behind the scenes look at how I created the accompanying graphic used in this post and other graphics you've seen of a similar style across Nellie and Co.

*This post does feature affiliate links for Picmonkey. Should you choose to purchase Royal Features using my links, I will receive a small commission. For more details, please consult my Privacy Policy.

Monday, 3 August 2015

How To Code Windows 8 Style Social Media Icons

Font Awesome is an online program that can be easily installed within your blog that allows you to use icons and brand logos as fonts, allowing for easy customisation, clearer, crisper social media icons for your blog, and lots of room for experimentation. During one of my many experiments with Font Awesome, I came across to ability to create social icons in the same style that you'd find on the Windows 8 interface, similar to 'Flat Design', a very popular trend in current blog design. If you're a fan of vivid, bright colours and like the idea of having Windows 8 Style Social Media Icons, then you've come to the right place.


First Step: Installation

Install is a scary word, but I can assure you, the process is really easy and really simple.
You're going to need to go into your blogs template and enter the following code just below the <head> tag.

<link rel="stylesheet" href="//maxcdn.bootstrapcdn.com/font-awesome/4.3.0/css/font-awesome.min.css" />

Be sure to click save, and the icons should become available to use afterwards.

Sunday, 10 May 2015

7 Design Resources I Can't Blog or Design Without


Designing a blog isn't easy. There's a lot of trial and error, there's a lot of research that goes into getting what you want, and there's a lot of finding the right tools for the job, and trust me, it's a headache if you don't know where to look, who to go to and what to use, so today, I fancied giving you insight into my tools of the trade and how you can get your blog looking slicker, quicker.

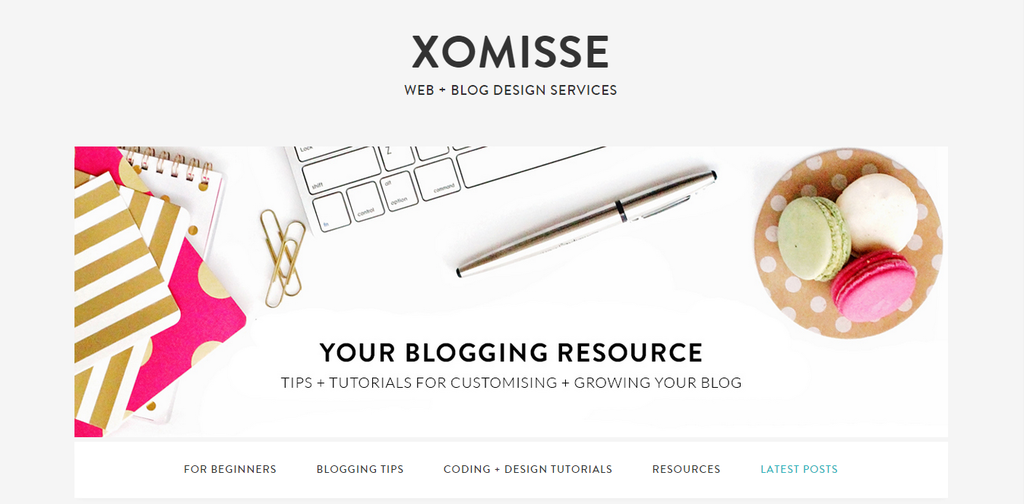
XOMISSE - Web and Blog Design Services

 photo xomiss_zps2fvioqzr.png
Elaine is without a doubt one of my go-to bloggers when it comes to design tips and tricks. I could name any number of features in our design that I learnt with the help of her highly detailed, easy tutorials. She's always coming up with the smallest of tips that can make your blog look and feel exactly how you want it, without taking you hours to do so. A lot of what I've learnt and been inspired to create has come for her work, and the best thing about her advice is that once you've cracked it, you can easily recreate, edit and add to the tutorials to create the exact look your wanting. I couldn't imagine not using XOMISSE when I'm looking for inspiration and how-to's when designing and neither should you.