
Create something visual on your blog post is a sure fire way to get your post gaining more views. You might be ready to read for the long haul, but 90% of information transmitted is visual, and it's processed 60,000 times quicker than text. 40% of people respond better to visual images, and over 45% of people say design plays a huge part in the credibility of brands - all more than good enough reasons to consider using visuals in some way or another on your blog. Not only that, visuals are much easier and much more likely to be shared on social media, and with an accompanying image, your post can go from cold to behold.
So why do so many bloggers not use graphics?
They don't know how to. They don't know which programs to use, or better still, they've been brainwashed into thinking the only way to create great looking visuals is through Adobe, and sure, I can't speak for Adobe, I can't afford it and therefore can't use it, (Lauren at Elle and Company has a lot of tutorials for people more interest in the 'professional' graphics route) but there are so many other great options available for bloggers lacking design experience. Even better, there are programs available online, completely free, and I'm a passionate believer in getting what you can for free before going all out.
I use two free image related programs: Picmonkey and Canva
Today, I want to focus on how I use Picmonkey to create my most commonly used graphics. Picmonkey is a free to use website that allows for collage creating, image editing and creating graphics for free, although for a monthly or annual fee, you can access further features such as extra fonts, better quality clip-art images and photo editing that enrich the users experience, although I personally know of a few loop holes to gain access to these free features in other third party ways, but that is for another day. For now, here's a behind the scenes look at how I created the accompanying graphic used in this post and other graphics you've seen of a similar style across Nellie and Co.
*This post does feature affiliate links for Picmonkey. Should you choose to purchase Royal Features using my links, I will receive a small commission. For more details, please consult my Privacy Policy.
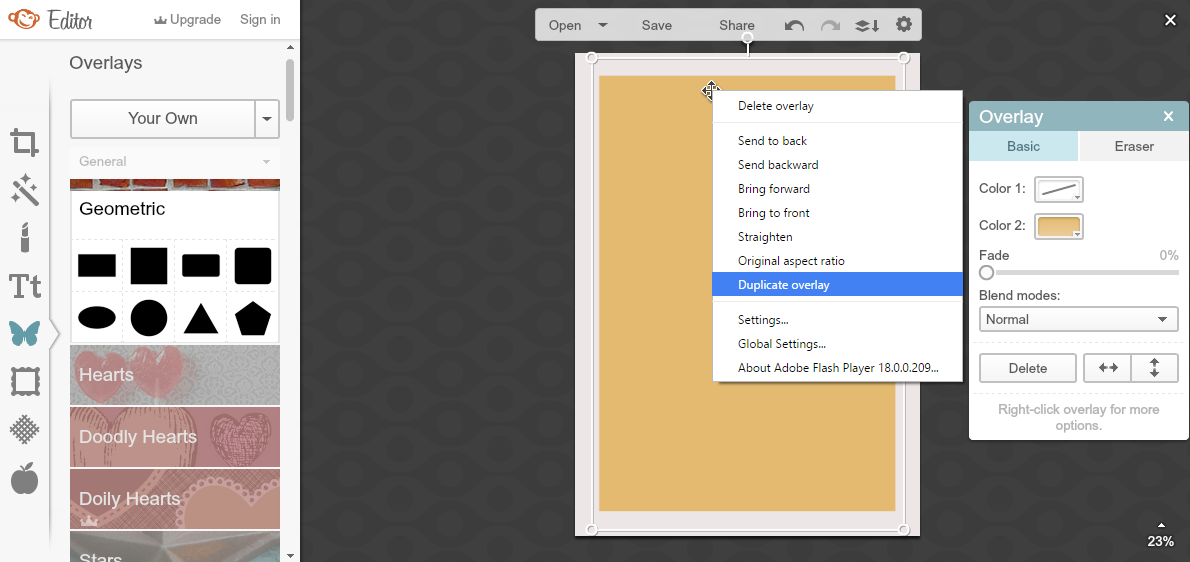
1. Firstly, I open up the 'Design' option and choose 5x7
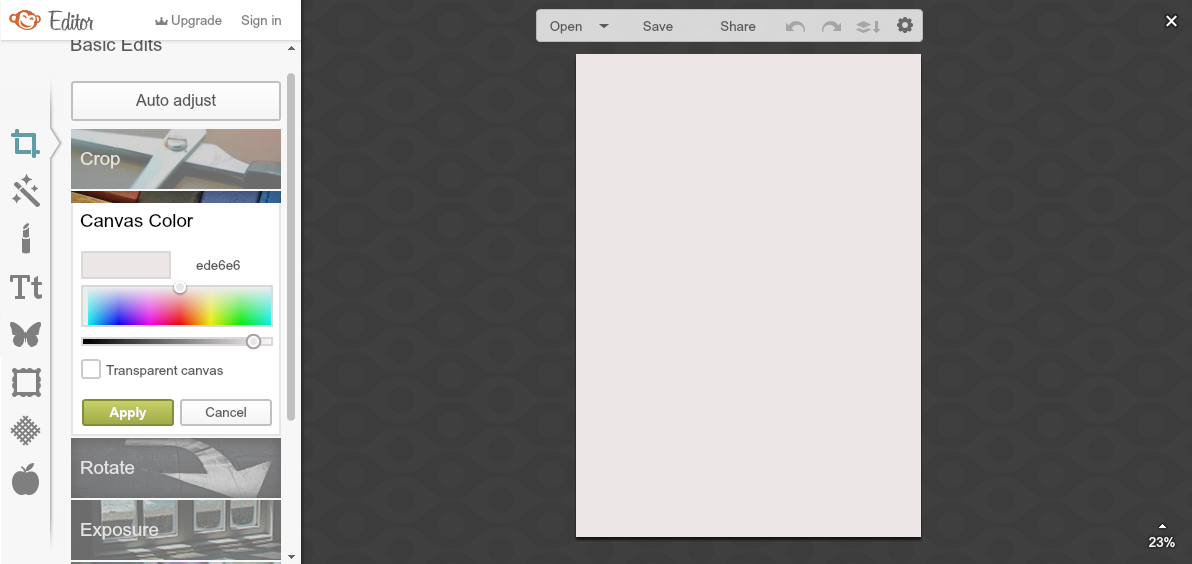
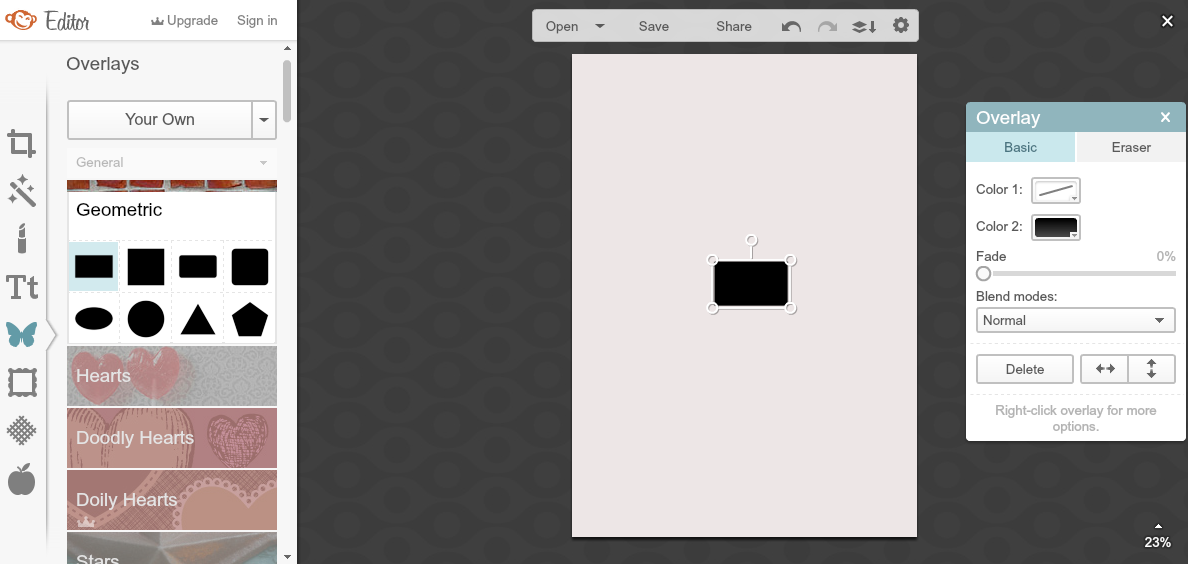
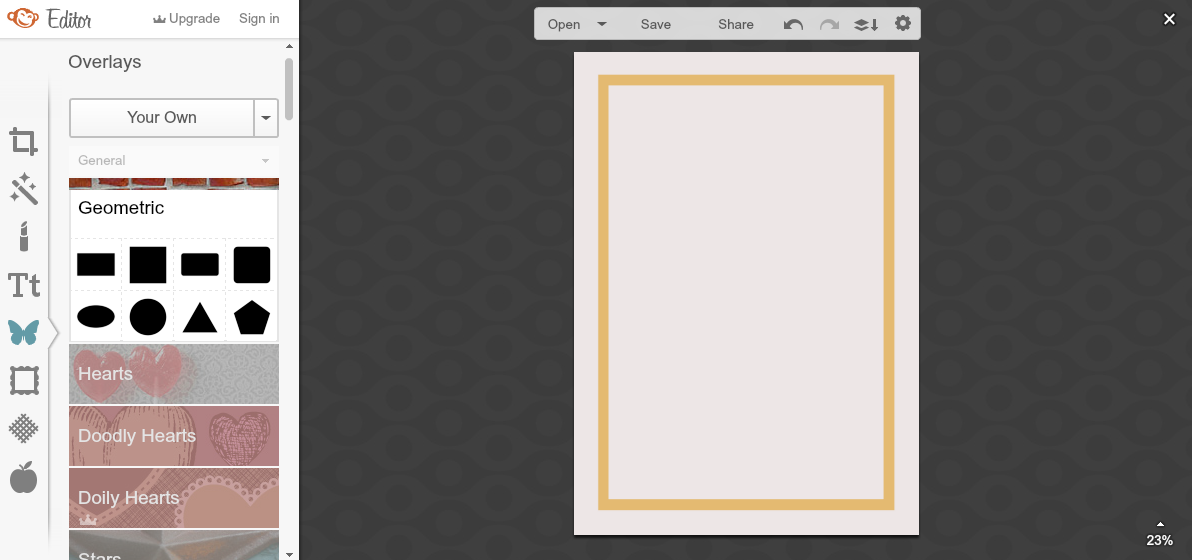
2. Then I choose one of six colours and start overlaying
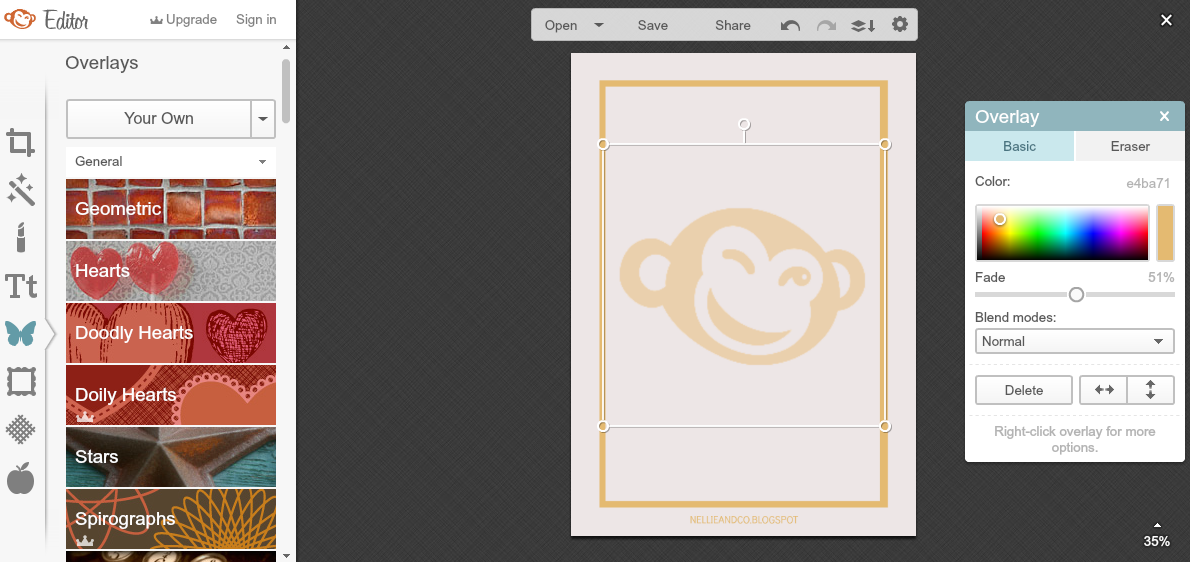
3. Next, I add my blog web address as credit
Whenever you create a blog graphic, it's always good practice to include your web address in order to add a sense of ownership as to who the graphic belongs to and where you can find more information on the graphic. Should the graphic be spread around social media, then you would like for people to be able to find out more, and find you when they've taken an interest in the subject your blogging about. Include your web address on graphics, or lose out on free promotions.
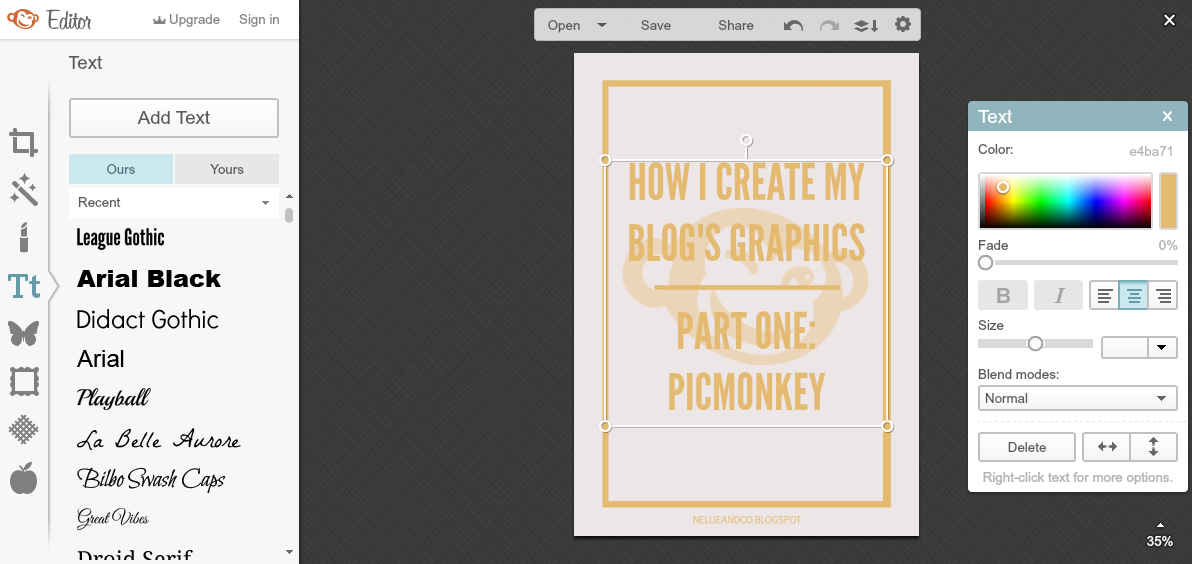
4. Lastly, I add the unique details
One of the things I love most about my graphics is how simple, and yet attractive they look, and this is all down to Picmonkeys 'Overlay' option and clip-art images. Ever wondered how I get the partially transparent clip-art images within my graphics? I search for them on Google, ensure they are free to use personally and commercially and then save them. Easy peesy. When I'm adding in a clip-art image, I usually do my utmost to choose black images as the black can be easily changed to another colour within Picmonkey, which mean it's the same in colour as the overall graphic.
For the last detail on the graphic, I added the text. I use 'League Gothic' as the lead font on my graphics which is available through Picmonkey's fonts, and once gain, change the colour and centre the text. From this point on, it's a touch-up and tweak, making the font the right size for my title, settling the lining up of the text so it looks most appealing, and gets straight to the facts, so if the graphic is shared, the subject is front and centre and people understand what it is I'm talking about. I think you'll agree that the final result looks rather good.
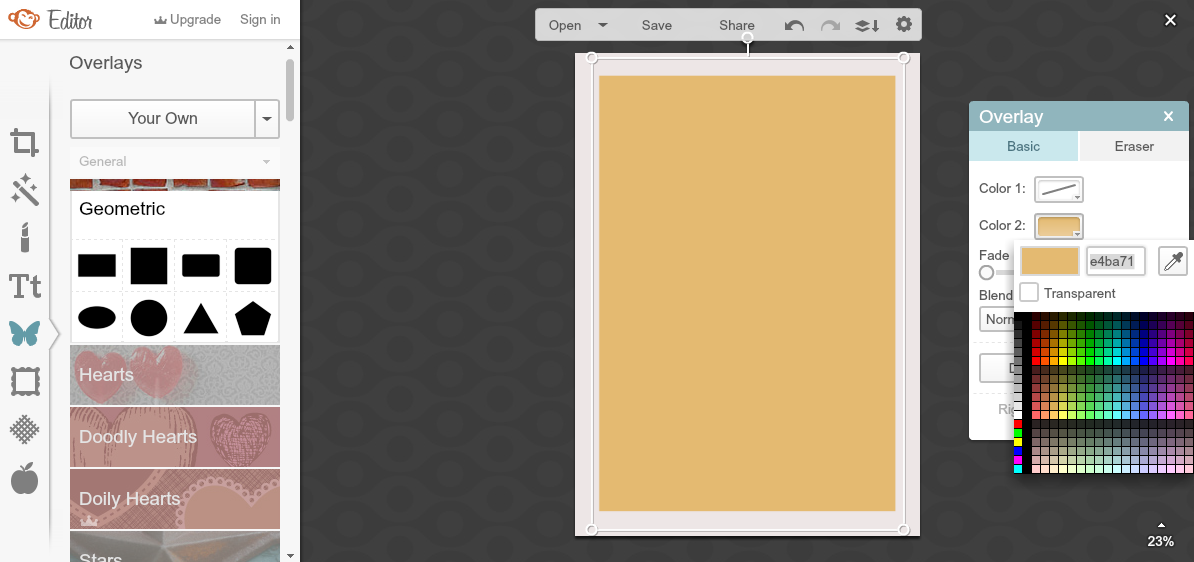
The best part? I can change colours rather than start a fresh
One of the things I love most about Picmonkey is that once you've saved your image - as long as you haven't closed the tab you have it open in, you can continue to edit the image as much as you like. That means I can switch out one colour for another, and create all my graphic templates all at once. I simply delete the clip-art image and text and save the template as mentioned earlier after step 3. Then, by clicking on the first overlay added to the graphic, I can switch out the hex colour code for any of the other five used on Nellie and Co. Once this is done, creating the graphics only requires on step, the latter of the four, and only takes me a maximum of 10 minutes.
Simple. Good Looking. Quick to Create. Picmonkey is my Best Friend!


I love picmonkey and I've just started using canva. :) Love adding graphics to my posts now!
ReplyDeleteThanks for the tutorial.
As do I Chrystal, I can't wait to share how I create my canva ones! So glad you liked this :)
DeleteI've seen a lot of people talk about Picmonkey, but I haven't really looked into it before this. I'm definitely going to have to do so now! The graphics you use here on the site always look very clean and professional. Thanks for sharing these tips. :)
ReplyDeleteRenae @ Respiring Thoughts
Thanks Renae, that's so wonderful here, and knowing my simple look is great is something that makes me very happy. So glad you enjoyed the insight! :)
DeleteI love Picmonkey! I have been using it for years. My blog life would be in shatters without it. It is so nice of you to share your own tips :)
ReplyDeleteThanks Lucia, that means a lot, so pleased you liked it :)
DeletePicmonkey is SUCH a great tool. I use it not just for creating graphics but for editing photos I take of my books, as well :) I'm still playing around with creating my own graphics but it certainly makes content look a LOT better.
ReplyDeleteI use it for editing services too and it's SO GOOD. Making these graphics is so easy! :)
DeleteYessss Picmonkey and Canva are LIFE. I use Canva for basically everything and am still a bit of a wimp and mostly use their font combos and pre-made templates BUT WHATEVER. I love how easy it is to whip up something that looks eye-catchy and professional. I LOVE how all your graphics are themed. :D And how they're simplistic but beautiful so 1000% of awesomeness to you. And I agree: good graphics/photos are so important.
ReplyDeleteI am the same Cait, why spend money when you can have for FREEEEEEEEEE. I think carrying the graphics through with the blogs design, but keeping them themed to the topic is such a big thing for me, and keeping them simple, but eye-catching too was something that took a lot of planning, but I love them now, and I seriously wanted to share just how easy it was. Graphics are #1 importance.
DeleteI learned something new today! Thank you for this. I always look longingly at other blogger's graphics and I can't do it myself to save my life haha.
ReplyDeleteNow you've got an awesome chance at creating something fabulous Inge! :)
DeleteOkay seriously thank you for introducing me to Canva! I've been attempting (pitifully) to design some graphics for my blog to make posts a little more 'slick'. Alas, the stuff I've done is pretty subpar and even though my blog looks BETTER, it still doesn't look the way I wanted it.
ReplyDeleteI've heard of PicMonkey but was always kind of daunted by it? LAME I KNOW. But this makes everything seem so simple! And I've just searched around Canva too and I adore it - it's perfect and so easy to use. Even for a total design n00b like me (who, really, has no kind of artsy bone in her body)
You're welcome Allie! Picmonkey is such a great intro into graphics and creating and editing and doesn't require any Photoshop experience, it's so easy and so quick, and is super amazing. You'll be creating amazing looking graphics in no time, can't wait to see them! :)
DeleteCANVA IS AMAZING!!!! I have just checked it out and it looks so good. The images for the graphics are so good, are they free to use?!? Like are they stock images? I love how they look and wow, just THANK YOU!!!! :) I am rather in love with it
ReplyDeleteI plan on sharing how I make my graphics through Canva too, but I'm so glad I've managed to show people free tools and resources they can use. Lots of the images available are free to use, anything that says free is fair game, but those that have a price, I'd avoid unless you seriously want them :)
DeleteThanks for the post! I had a go with Picmonkey and then Canva, and got nowhere with both. Your instructions were good, it's just I'm terrible with stuff like this. It just wasn't coming together easily and gobbled way too many hours. I'd be interested to see how you use Canva though. I'd used that before today and found it easy to navigate, but today and a few other times, my finished result has been blurry. I made a graphic for Top Ten Tuesday and one of the lines of text was blurry. Not terribly so, but it just annoyed me enough to not want to use it. Love your graphics and look forward to more of these posts!
ReplyDeleteI use Picmonkey too, but I never thought about using it for graphics! What a clever and easy way to make stunning pictures :)
ReplyDeleteI can't wait to see how you use Canva. I've just recently started using these two programs and I think that I am liking Canva only because it gives you the option of using your own fonts (but that's only because I've bought some in the past). Great post!
ReplyDeleteAh this is awesome! I'm super terrible at making graphics. I use to use photobucket haha. I think I tired picmonkey before but didn't stick to it. I'm totally loving Canva though! Thanks for the heads up!
ReplyDeleteJust starting out on my blog journey and was looking for some great ways to incorporate grpahics without the cost. Thanks for this. It looks simple, and gives me hope for my future graphic design. Thanks!
ReplyDeleteCool that I hit this blog. Continue the good work
ReplyDeleteAborcja Londyn
Snappa's drag-and-drop editor, it’s quick and easy to create your own graphics for blog posts, social media profiles and ads. The tool provides access to more than half a million free stock photos, 70,000+ vectors and shapes, and 200+ fonts. It's free to download up to 5 files per month, or $10 a month for unlimited downloads.
ReplyDeleteI am really enjoying reading your well written articles. It looks like you spend a lot of effort and time on your blog. I have bookmarked it and I am looking forward to reading new articles. Keep up the good work.
ReplyDeleteDevOps Training in Hyderabad
You have completed certain reliable points there. I did some research on the subject and found that almost everyone will agree with your blog.
ReplyDeleteData Science Training in Bangalore
I am another customer of this site so here I saw various articles and posts posted by this site,I curious more energy for some of them trust you will give more information further.
ReplyDelete360DigiTMG, the top-rated organisation among the most prestigious industries around the world, is an educational destination for those looking to pursue their dreams around the globe. The company is changing careers of many people through constant improvement, 360DigiTMG provides an outstanding learning experience and distinguishes itself from the pack. 360DigiTMG is a prominent global presence by offering world-class training. Its main office is in India and subsidiaries across Malaysia, USA, East Asia, Australia, Uk, Netherlands, and the Middle East.
ReplyDeleteКаждый хочет просмотреть собственную судьбу и видит конкретные варианты ворожбы по максимуму достоверными. Гадание Таро онлайн на любовь - способ просмотреть предстоящие события постоянно манил человечество. Гадание дозволяет увидеть, что вас подстерегает в предстоящем времени.
ReplyDelete