
Surveying your audience is without a doubt one of the best things you can do for yourself and your blog or business, and of all the survey creating options out there, Typeform is most definitely the most functional, easy the understand and attractive of the bunch. I talked a little about Typeform when I shared some reasons behind surveying your audience and how it can be of help, but being recommended something by someone isn't always a big enough push.
Naturally, trying something new is daunting, and when you don't understand the system, you're likely to abandon the thought, so today, as promised, I'm sharing an in-depth tutorial of Typeform, everything from building and designing your first custom typeform, to how to configure it and analyze all the data you'll receive once it goes live. Complete with screenshots and tips and tricks, you'll be creating surveys in your sleep that your surveyees (yes, that is a word believe it or not!) with be dying to take.
Now it's worth noting that you will need to set up an account at some point during the process, so it's probably much easier to get it out the way before anything else is done. As soon as you've sorted that out - and it shouldn't take all that long - we can get started. It's also worth mentioning that you'll be given the opportunity to watch numerous different walkthroughs throughout your first time, so don't worry if it all looks a little alien, with my help and Typeforms, you'll be survey royalty in no time.

There are two choices when it comes to creating a survey; you can use a ready made template that Typeform provides based on different types of forms, such as customer service feedback, or contact forms, and these forms are great for certain specific cases, however, I recommend you start with a complete blank slate which allows you choose the options that suit you and your needs. I'll be using the custom option during this tutorial, and sharing a quick run down of Typeforms features and options, how to design your survey and how to share it. Let's get started.

Typeform's Building Features
Whether you start from scratch or with a template, getting to grips with each area of the survey can be quite a daunting task at a first glance, but each of the options are easy to use and understand, but here's a quick run down of what each options enables you to do with your survey.

Welcome Screen | This is what will greet your surveyees before they actually answer any of your questions. You can use this area to say a quick hello, share a thank you for completing a certain task, or even quickly double check that they're happy to give the survey and go. You can upload photos and gifs too. At this point, it's all about the friendly welcome.

Short Text | This is usually used when you're looking a quick simple answer to a question. It's very much an open option, so you're likely to get a lot of different responses to a question like this, but it can be helpful in terms of grouping similar answers and gives your surveyee more freedom in answering.

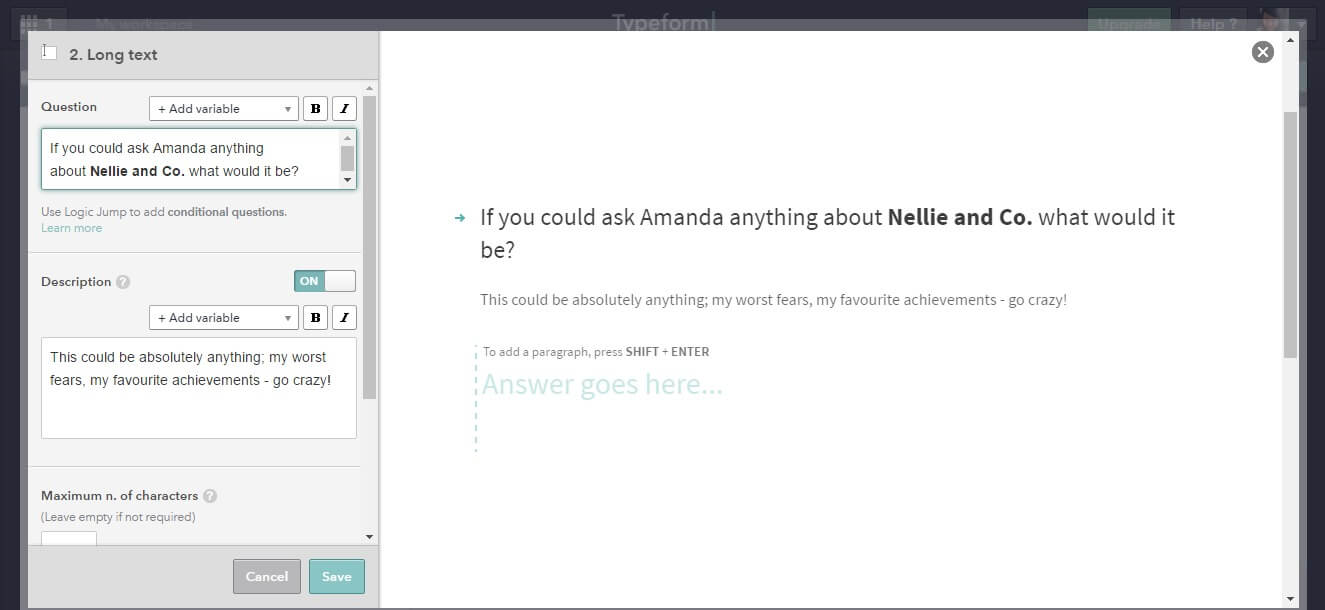
Long Text | This options works exactly the same as Short, with the same inner workings and options, it's just better for longer answers worth more detail and information in them.
Statement | Statement is not a feature I've used much before, however, it's a handy little feature for letting your surveyees know that there's only a few more questions to go, which means it's likely people will quit half way through.
Dropdown | This feature involves setting a question and proving set options for surveyees while also giving them the option to answer freely. You must set a minimum of 8 answers, which could make this feature less used than others, however, if you're looking for variety, this is a good option.

Email | This is also set up quite similarly to other options like Short or Long text, however, this is created for the sole purpose of gaining email addresses. You can offer somebody something exclusive, or simply ask if they'd like to be added to your mail list.

Date | This is as simple as it sounds. You can ask somebody for their date of birth, (depending on your survey) or when they first started following your blog. It's not an option I'd guess is used frequently in our line of business.
Legal | This isn't usually a big issue for bloggers and small business owners if it's just a general survey, however for companies looking for feedback, or collecting information for promotions or purchasing contracts, this is a very important helpful feature. This where you essentially have somebody accept or no accept your terms of service or agreement, or such as accepting that you're information may be shared with third parties if you agree to it, like an email service.

Website | This feature allows you to collect links to external websites. Simple and sweet.
Payment | This feature isn't available in the free version, however you can use this feature to collect payments for a service, a product, or a donation, but it can only be used with a Stripe account. For more information on this feature, checking out Typeforms Help Information on Payment Fields.
Multiple Choice | As you would expect, this option gives the surveyee the option to choose an answer out of a preselected collection decided by you. You can have up to 25 choices, and can further make options available for the surveyee to choose multiple answers or one, however, you cannot do this after you've collected data.

Picture Choice | Much like Multiple Choice, just with pictures for that added design element.

Question Group | This feature allows you to create sub-questions. For example, you could ask somebody to rate, on a scale of 5 stars, your blogs design or general content, or you ask them to give feedback on your customer service or product based on what you advertised it to be and how the end result was received.

This is also the perfect place to talk about Question Variables. When you choose a type of question, you'll see at the very top of your left-side column, you have an option that says + Add Variable. This allows you to slide a question into another.
Using on of the above examples and another feature, Rating, we're going to ask the surveyee to rate our blogs design. We add in the Question Group feature and set our question to "How would you rate 'insert blog name here's.." making sure to leave the question open. We then save, and when we come back to the dashboard, over hover Question Group and you'll see options on the far right, Copy, Move, Delete, and Expand. Click Expand and and expansion will reveal itself underneath. Choose the Rating feature and add it directly underneath Question Group where the expansion has appeared.
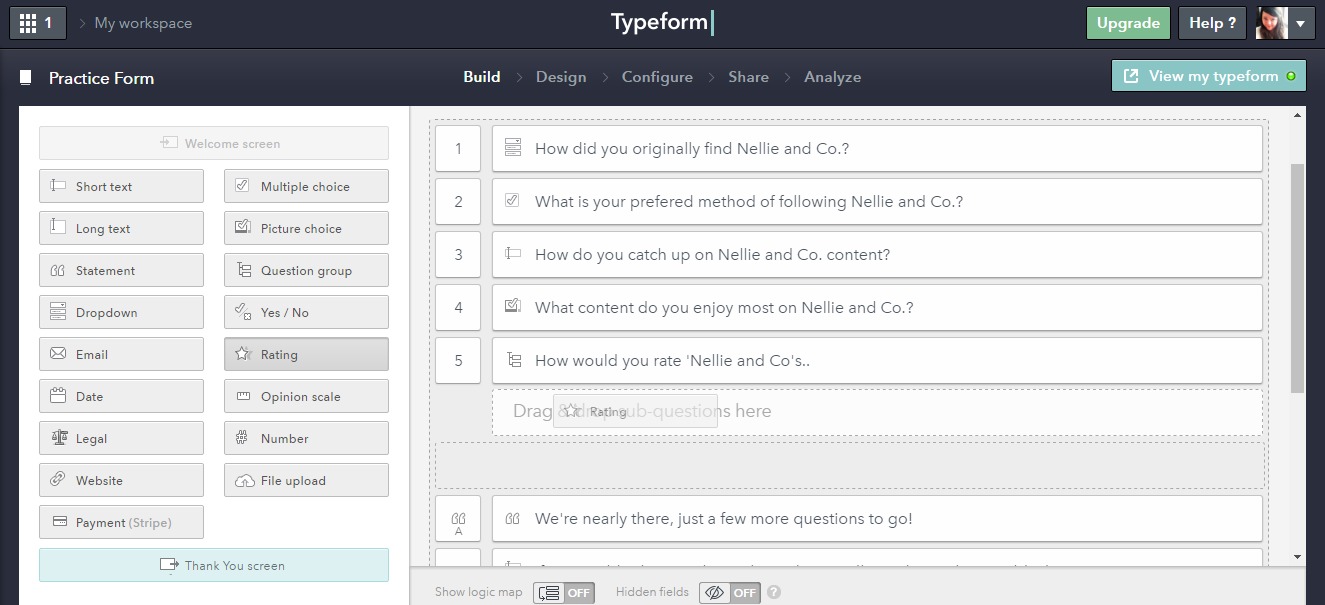
From there, fill in the question as you would any other. When using the Rating feature, you can set the length of the rating, from 1 to 10, and you can also choose what images you want surveyees to rate out of of, such as ticks, trophies, stars and even cats.
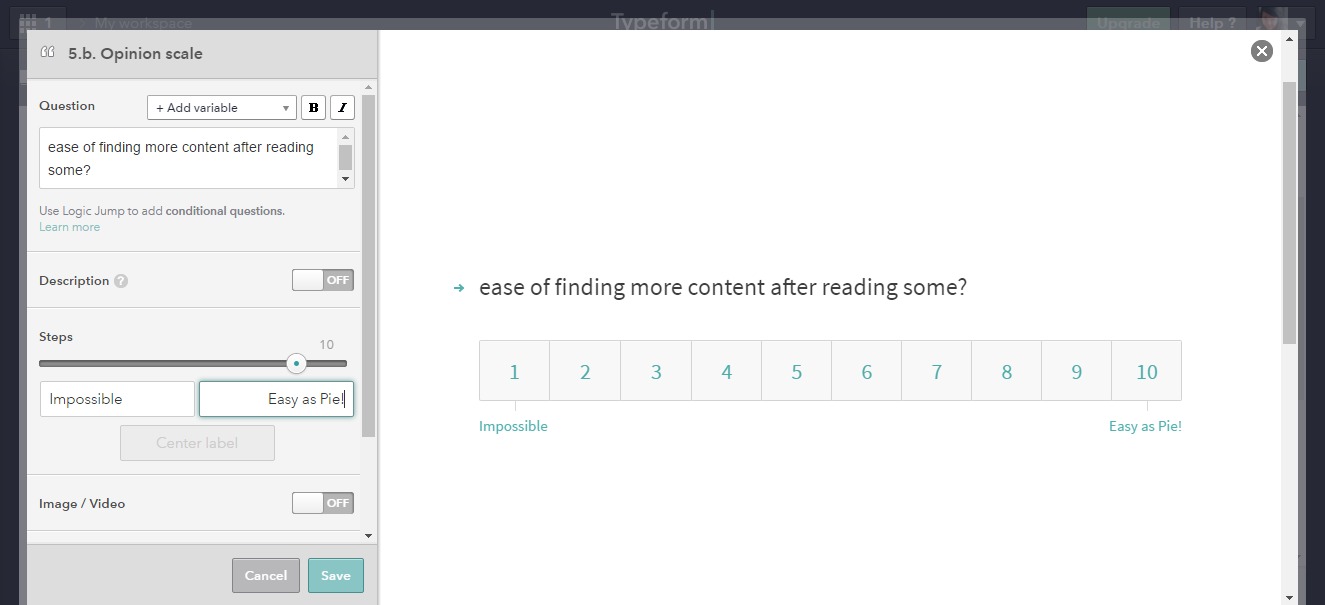
Opinion Scale | This features does exactly what it says on the tin, and is pretty handy when you're looking for a better scale than a rating. Using this feature, a surveyee is made to choose a place on the scale that they would put your blog on.
Numbers | This feature is used for numerical answers.
File Upload | This feature allows the surveyee to upload a file of sorts, such as an image for an application, or a document for prove of identification depending on the use for the survey. This is also not available in the free version but you can find out more on the feature on Typeforms Help Information on File Uploads.
Thank You Screen | Sadly, changing this is also a pro feature, however you automatically get a thank you screen that does the job fairly well anyway, so don't worry.

With the features covered, there's a few other things to cover before we get onto the fun part, the designing. There are two other helpful tools when putting together your survey, Jump Links and Variables. Jump Links are sadly a pro feature (which you can find out more about here!) and aren't accessible on the free version, however Variables are included.
Variables are essentially extra features that allow you to turn a survey into something more, like a quiz or a questionnaire by making use of Piping, Hidden Fields, Calculator and Payment, all of which you can check out more on through Typeforms Help Centre on Variables.
Typeform's Designing Features
Now it's onto the designing your survey. There are three general options when it comes to designing you survey: Colors, Fonts, and Background Image. These three features allow you to really customise your survey to suit whatever it's use, whether you're looking for a fun and exciting quiz, or a general survey for your blog.
Colors | You can either go straight for a theme that Typeform already has, or you can create your own, and colors is the first step to doing that. You can choose what colour your questions appear in, what colour the answers your surveyees give are, what colour your buttons are, and what colour your background is. You can choose hex codes from Color-Hex in order to get the right shade, but don't worry if you can't get it perfect.

Fonts | Pretty much what it say on the tin. Choose a font and it'll change all the fonts.

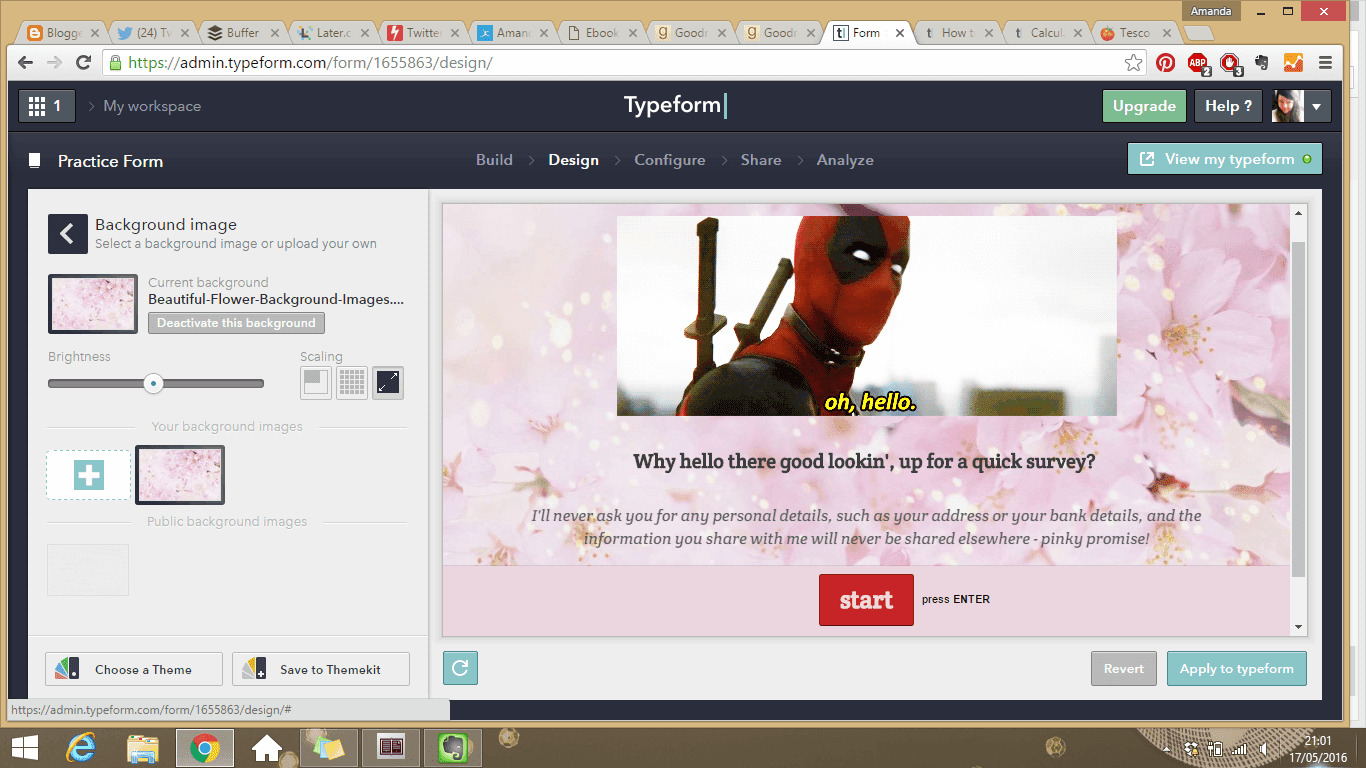
Background | You can upload a photo if you choose, and this will appear throughout the survey.
Typeform's Configure Features
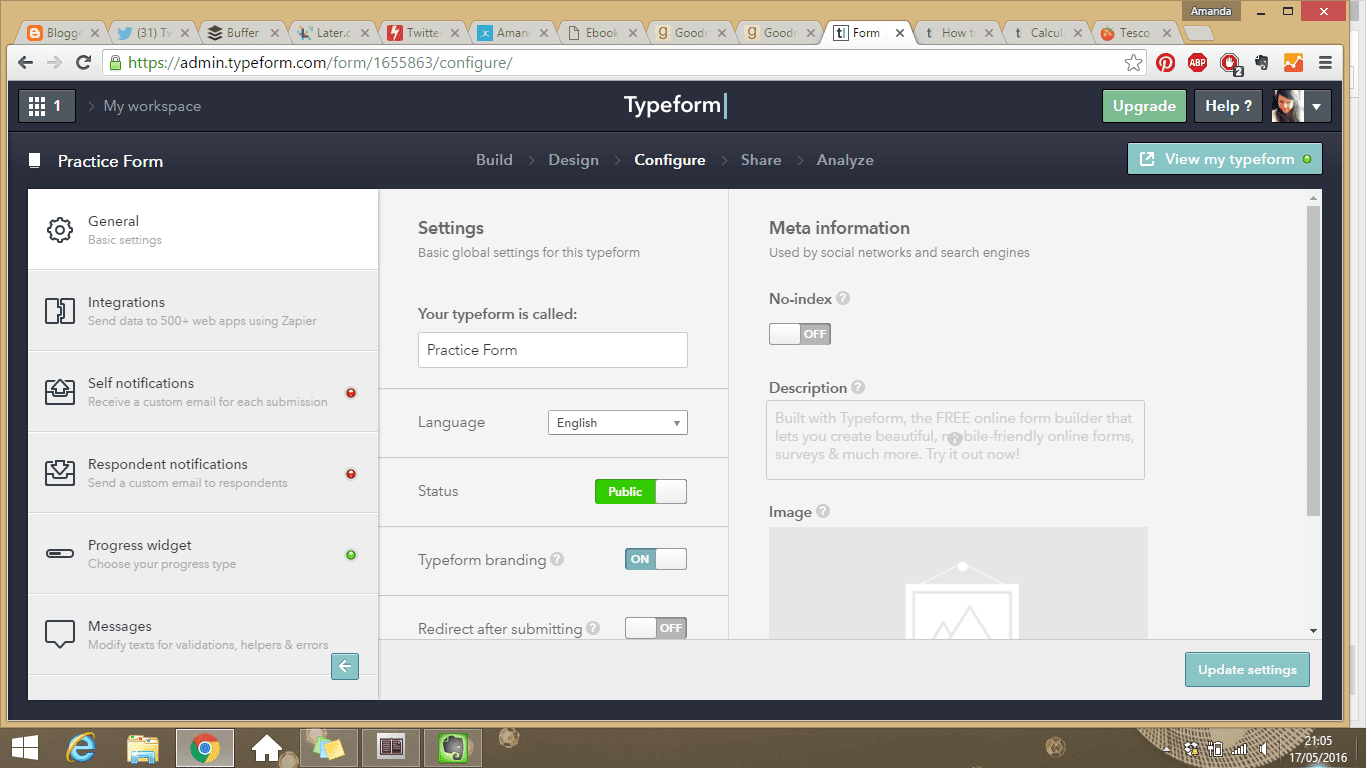
Now it's time to Configure your survey. Configuring your survey is completely up to you, however, I would suggest you at least make sure everything is as you want it if you don't want to edit things. You can Index your survey to Search Result if you wanted to, and you can set your survey to public or private.
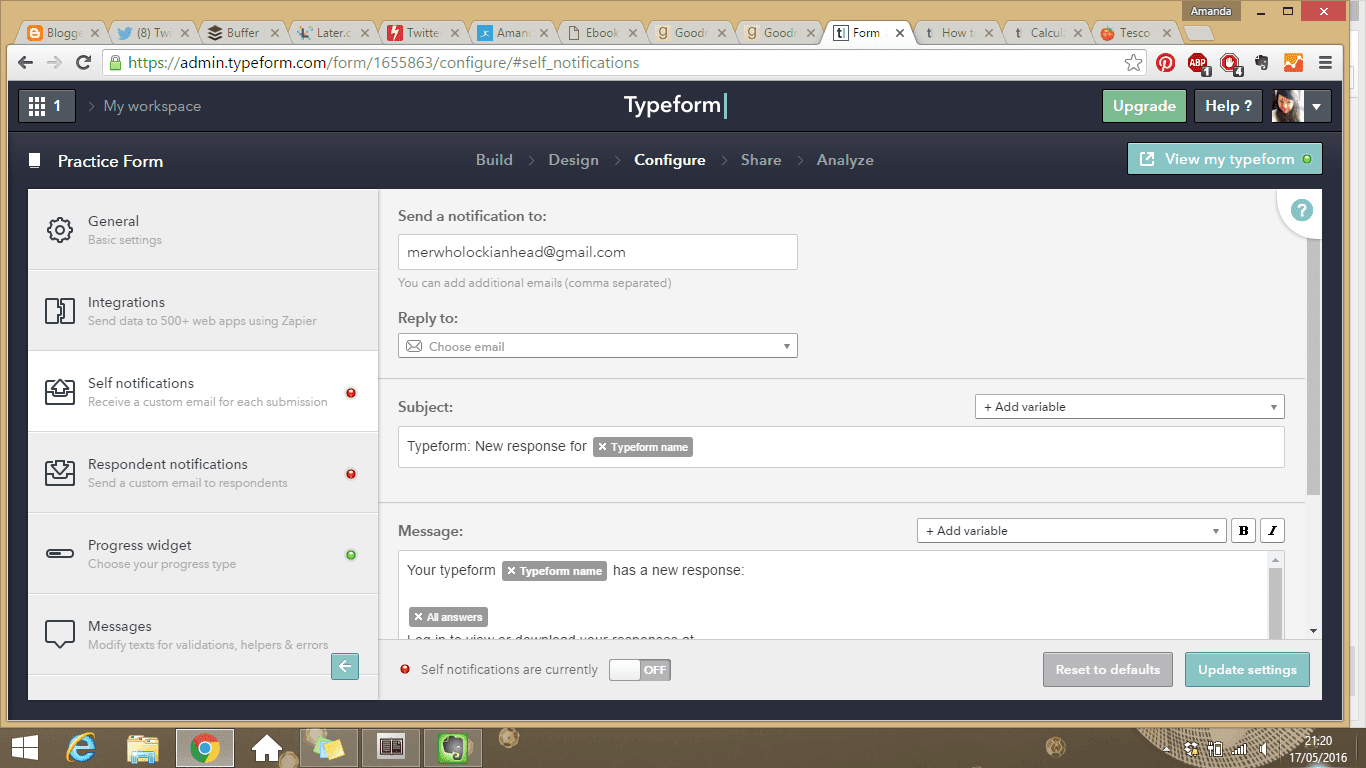
You can also set Typeform to send you email notifications when somebody fills in your form, however if you're expecting a large amount of responses, that might not be so wise. You can also send a custom email to people who respond should you receive their email address, but this is also a pro feature.
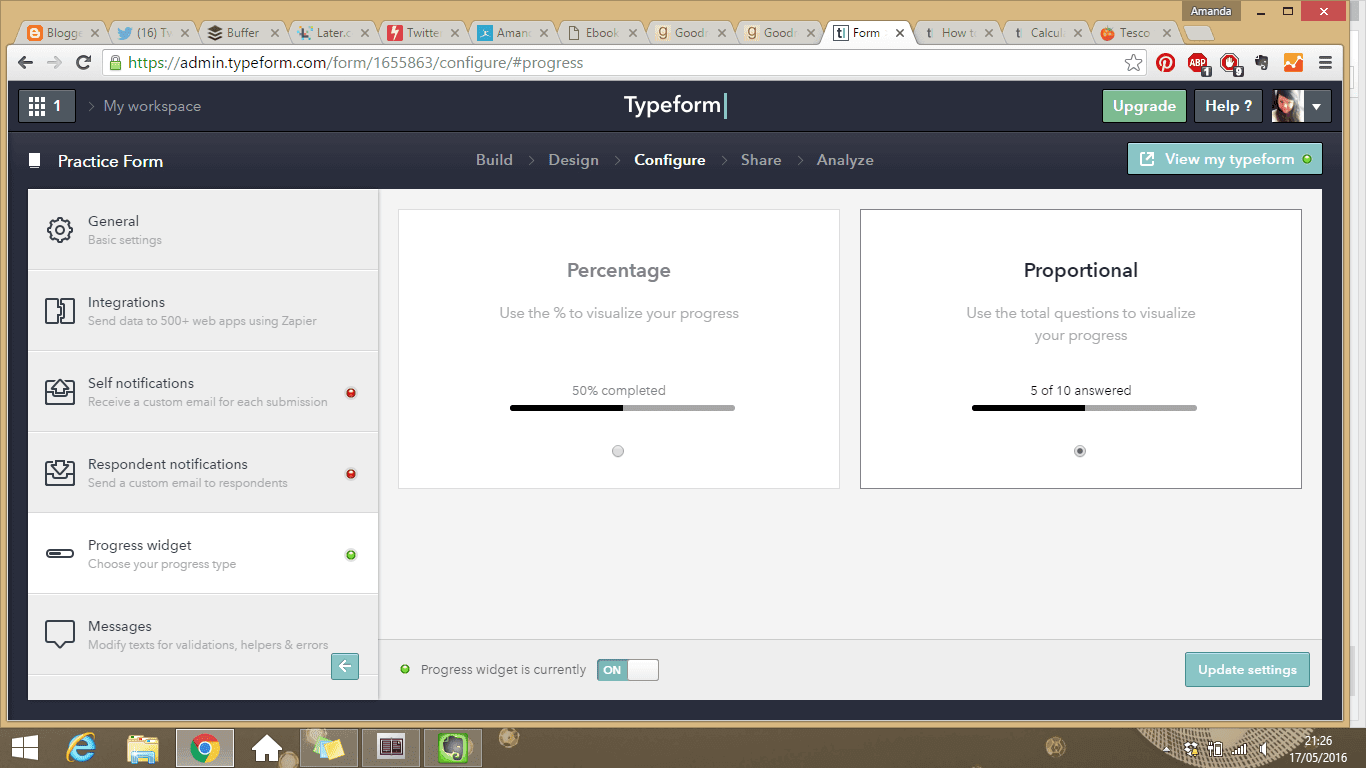
Another feature you can change is the progress bar, setting it by either numbers of questions or percentages, which can be helpful if you have quite a few and don't want to scare surveyees away. The final feature worth noting when configuring is being able to change the messages that appear throughout the survey, such as mistakes or confirmations.
Typeform's Analyze Feature
Since the Sharing option is such common sense, we'll move onto the Analyze feature. When viewing your Metrics, you'll get a good look at the statistics behind your survey, everything from how many responses you get to how many views, from how they fill it in, to who finishes it in comparison to those who don't.

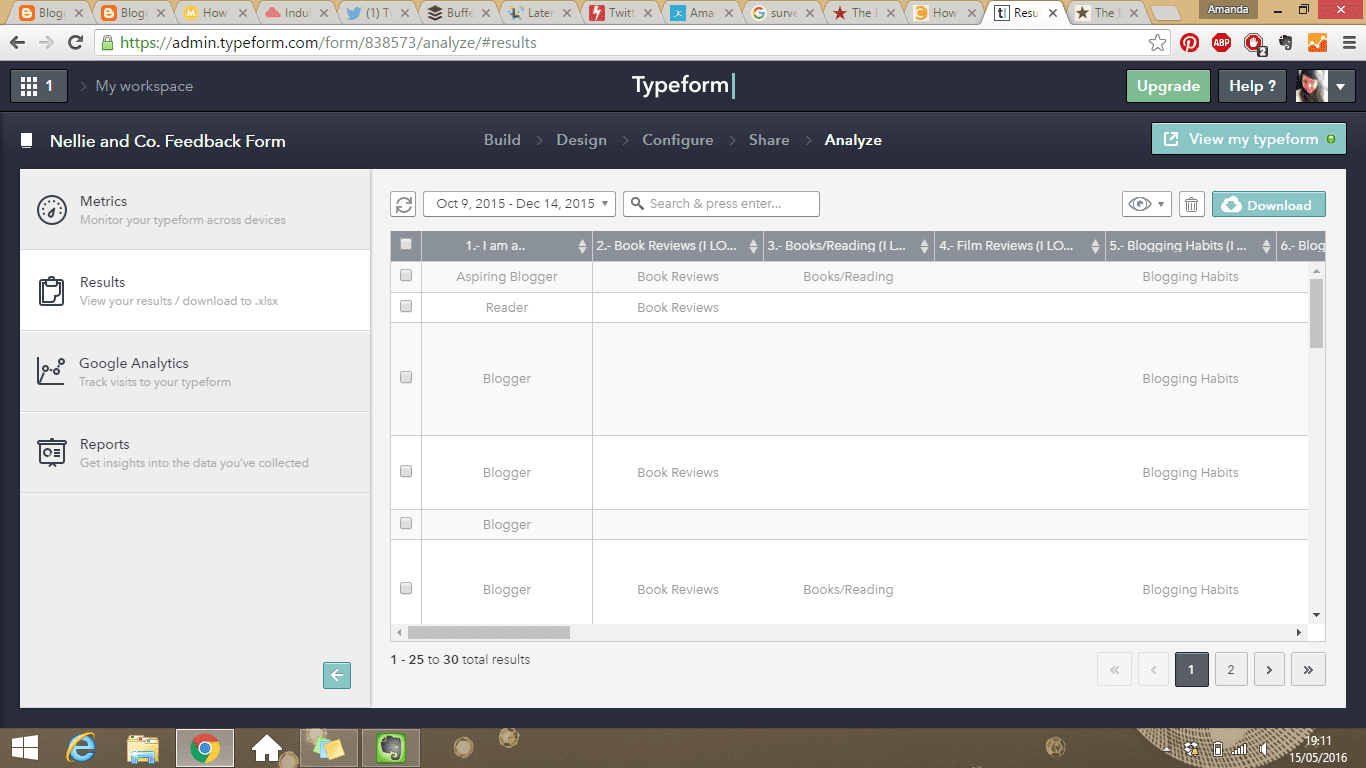
Results however will share with you all the information that's been put into your survey in a spreadsheet format, which is great if you want to put the information into Google Sheets or something similar, which means lovely fancy graphs too.
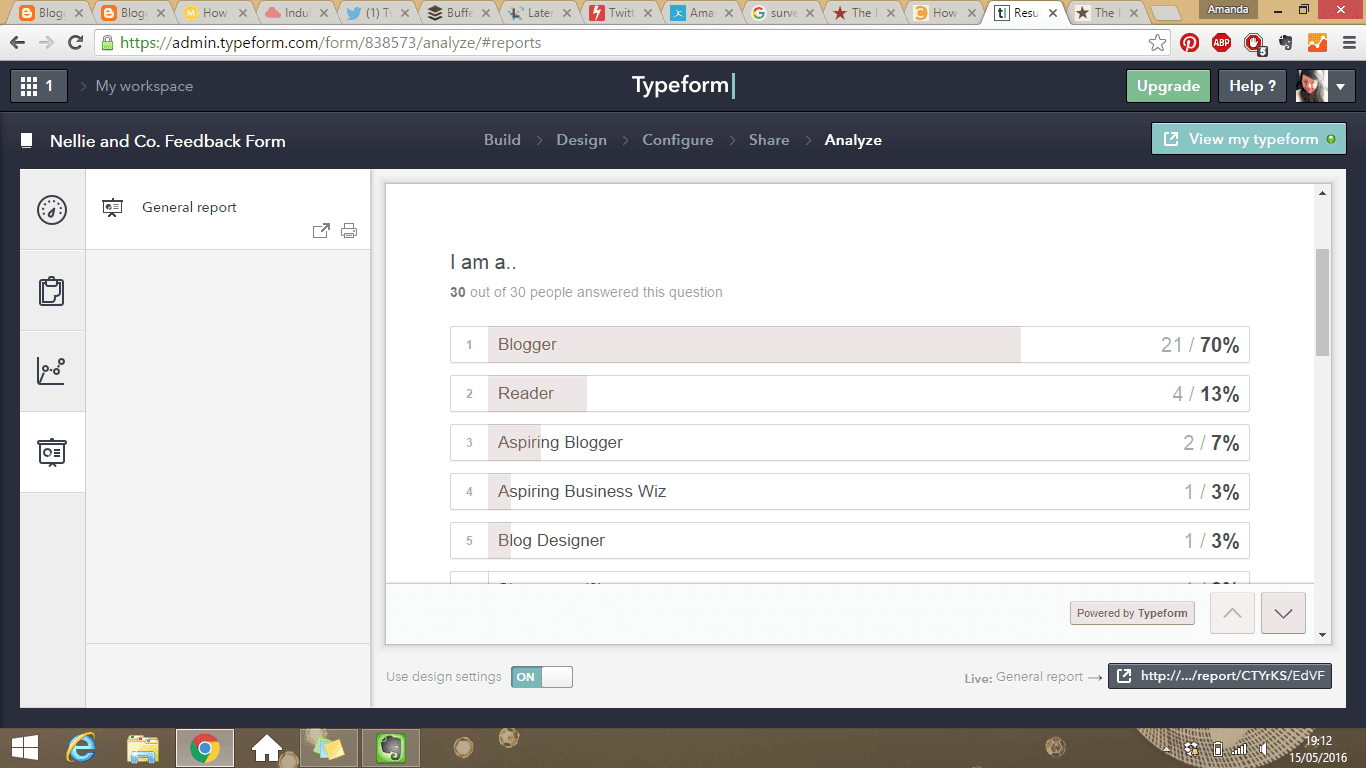
Reports allows you to check out the responses people gave to your survey in the form of the survey, from how many people actually answered the question to the amount of people that answered with a specific answer, which is great on multiple choice questions. It's a better way to scan the responses, but Result is better if you want the details.
And there we it, it's as easy and simple as that. Of course, you can make the process easier by using a template, however, it's worth remembering that your template is automatically saved no matter where you are in the process, and you can always make it public or private whenever you want. As with most things, the pro version has better features, more customisable areas and better opportunities, however, I seriously recommend you using the free version has it's perfect for almost any standard survey.
Whoa, this was such a detailed guide, Amanda! Love it, and will definitely save it for when I use Typeform in the future! :D
ReplyDeleteNellie And Co.: The Ultimate, In-Depth, Step-By-Step Guide To Creating Your First Typeform Survey >>>>> Download Now
Delete>>>>> Download Full
Nellie And Co.: The Ultimate, In-Depth, Step-By-Step Guide To Creating Your First Typeform Survey >>>>> Download LINK
>>>>> Download Now
Nellie And Co.: The Ultimate, In-Depth, Step-By-Step Guide To Creating Your First Typeform Survey >>>>> Download Full
>>>>> Download LINK 2P
I've never heard of typeform before, thanks for the massive guide and how-to! I think I'll check this out. I currently am not using any sort form service or plugin, but I have been wondering how handy it would be to have one ready. I read your other post about surveying your audience and I agree that it would be handy to know what your audience wants, likes, dislikes etc.
ReplyDeleteThanks for this awesome post, I'll have to check Typeform out!
Jordon @ Simply Adrift
يجب أن يكون هذا أحد أكثر محتويات الويب ذكاءً التي صادفتها في الآونة الأخيرة. يتشابه الأسلوب والتسليم مع NCLEX CERTIFICATE FOR SALE ONLINE التي تغير حياة الناس في الوقت الحالي. سأضع إشارة مرجعية على هذا الرابط حتى أتمكن دائمًا من العودة لمزيد من المحتوى الإعلامي. تحياتي لكم جميعا وسنة جديدة سعيدة
ReplyDeleteNellie And Co.: The Ultimate, In-Depth, Step-By-Step Guide To Creating Your First Typeform Survey >>>>> Download Now
ReplyDelete>>>>> Download Full
Nellie And Co.: The Ultimate, In-Depth, Step-By-Step Guide To Creating Your First Typeform Survey >>>>> Download LINK
>>>>> Download Now
Nellie And Co.: The Ultimate, In-Depth, Step-By-Step Guide To Creating Your First Typeform Survey >>>>> Download Full
>>>>> Download LINK se
I can safely recommend KB Surveys - GPR survey , I used their services when dividing a plot and later measurements for a construction project. Great contact, punctuality and everything comprehensively covered, from a map for design purposes to a post-construction inventory.
ReplyDelete