
 - I LOVE editing photos for social media and my blog graphics, so click through for the full tutorial on how I do just that, and how to make yours pop!")
Some say a good photo doesn't need editing, it's perfect as it is, and sometimes, I'll humour that idea. I've seen article after article after article that says unedited photos tend to gain the most likes, the most comments, the most interaction on social media, and especially on Instagram, however, what those articles don't take into consideration is that many users are now editing their photos before the image even hits the Instagram scene. When those articles say that unedited photos get the biscuit, there's a very likely chance that those photos are still being edited. A touch of brightness, a sharpening of look, it's been poked with the editing stick somehow, and mine are no different.
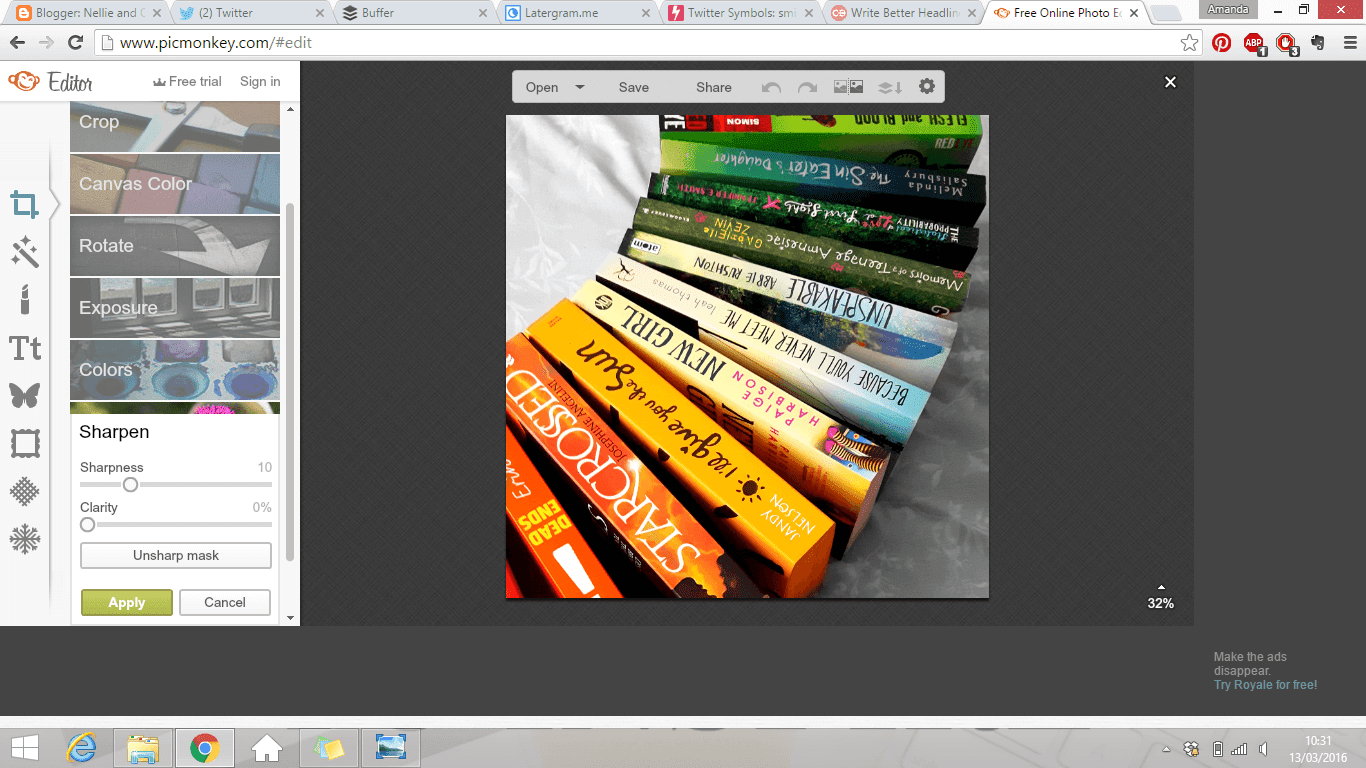
I've developed a step-by-step system that I use to edit my photos every single time. Every photo is edited in the same way, with slight variations on the actual depth of each poke, but generally, every photo is edited with the same method, which means that although I don't have a theme for my Instagram feed, they have a universal look and feel. Today I'm sharing my process, and the quick and easy steps I use to achieve bright and vibrant photos that stand out with happiness. Oh, and it's done with Picmonkey, but what do I do that isn't these days? I'M OBSESSED. *cough*
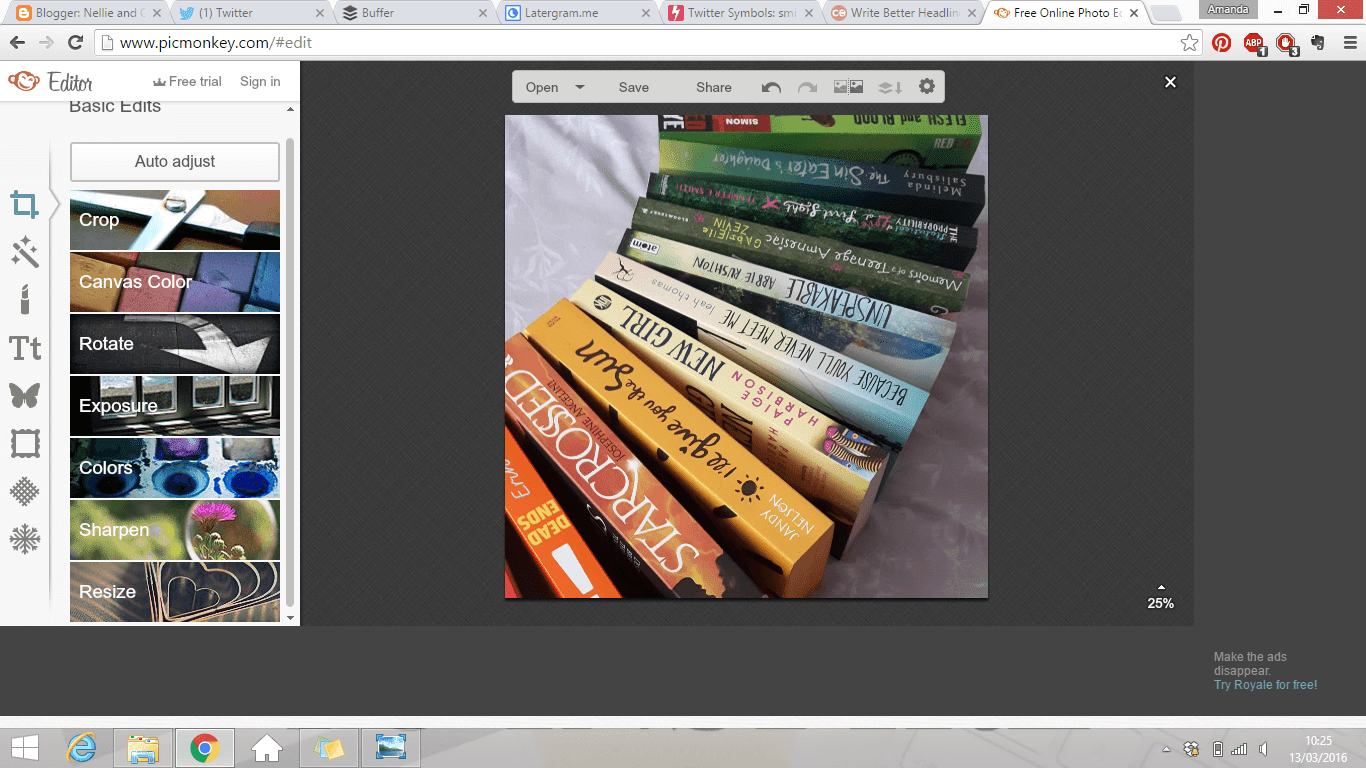
Before we get into the steps, I tend to get my cropping, rotating and the lark out of the way before I start poking the dead image with a stick, merely because most, if not all my images get used on Instagram, so a square is best for me, and also because then it's all about the actual fun editing past that.
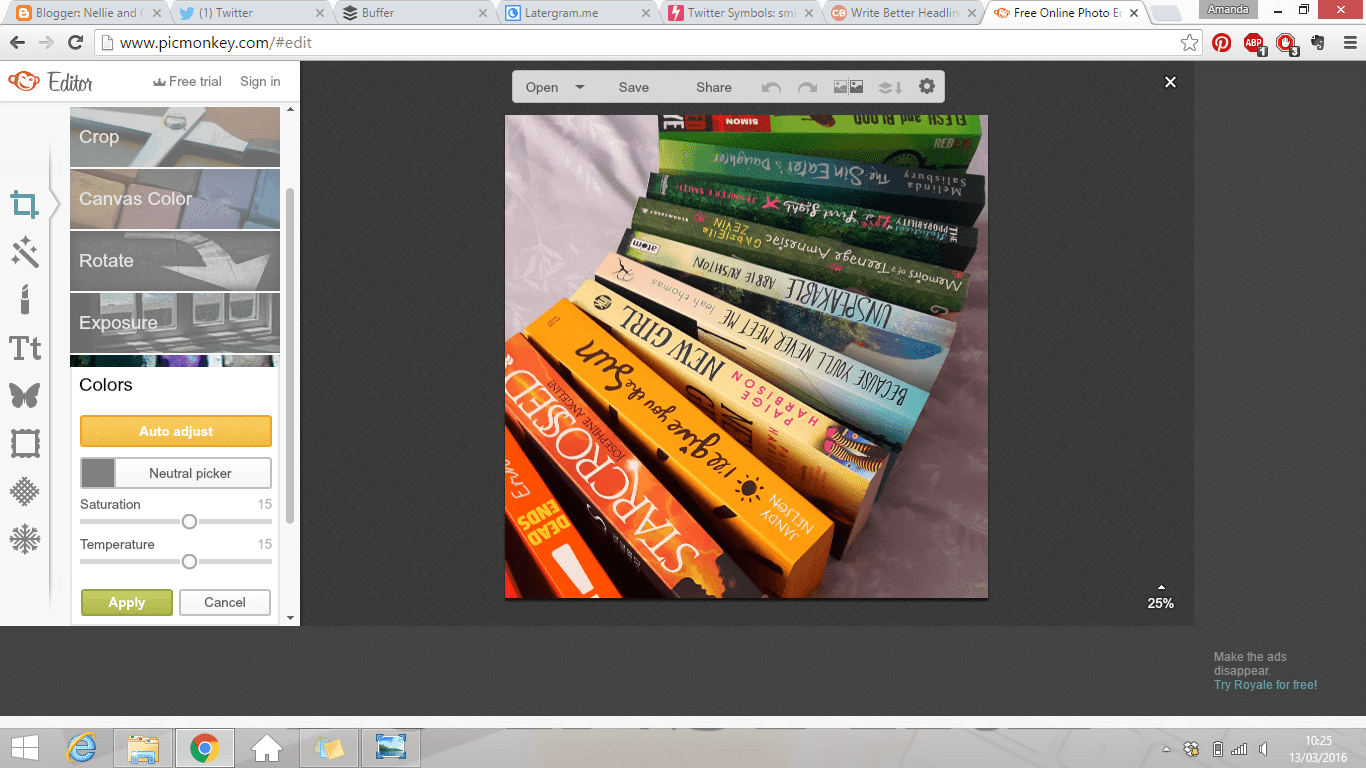
Step One: Add Some Coloring
*grumbles in a British accent about it being colours not colors*
Anyway.. I find that the best way to bring out most colours is with a good smack of colour editing, so as a general ball-park, I go anywhere between 10-20 on each photo for both temperature and saturation, however, different images with a different balance of colours within it will require a different ratio. In this images case, it's 15 for both. Isn't it just so bright and vibrant already? I LOVE IT.
Step Two: Expose Those Nooks and Crannies
I tend to find that exposure has the power to brighten absolutely any photo, and even the darkest, gloomiest and dimmest photos don't stand a chance when you have your exposure tool belt handy. I prefer to use more Highlight than I do Brightness, in more of a 1.5:1 ratio, but in most cases, I balance them out by going 10 for each, as I have in this image. I also try to balance out Contrast by either choosing 10 too, or equalising it with Shadows, my favoruite of the editing options. Shadows bring in a level of depth to your photo, an amount of weight, or in some photos, a level of importance. I will always go for 15 with colour photos, and linger around 20-25 for black and white, because depth and darkness is my jam.

Additional Note:
It doesn't really matter whether you apply colours first, or play with the exposure beforehand. I apply colours first so I can establish how an image will look right from the start, and balance out the brightness with shadows, but your images are personal to you, so you're not wrong if you switch the steps.
Step Three: Apply Black and White Effect
One of the more unusual steps in my editing process, but I always editing my background to be black and white, a) because it allows the subject of focus to stand out even more, b) because it works to have a whiter/grey background than a slightly brown/purple/off-white background than I have due to bedsheets, and c) because changing the colours of an image (such as temperature and saturation) can make the background much redder, and d) it makes my feed more balanced, less themed.
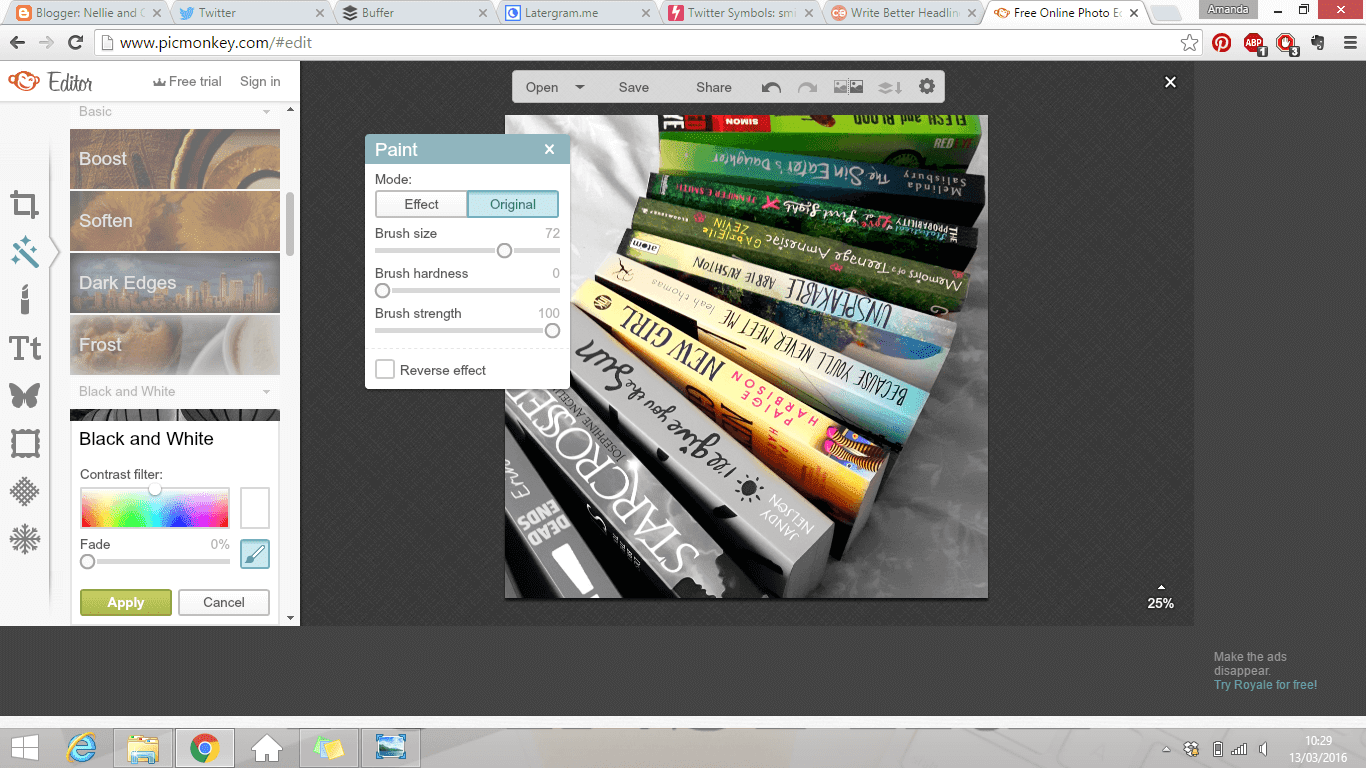
The actual secret to black and white accents on an image has already been exposed by my dear friend and master of beautiful images Cait over on Paper Fury, so you can get the details behind that specific magic trick over there, but it's definitely one of the most time consuming of steps, if not the most time consuming.
Step Four: Apply Orton Effect
I know most people don't add effects to their images when they're editing them, but I'm a dangerous person and I play dirty with my editing, however I only do it mildly. I've always liked the Orton Effect in Picmonkey, although I especially like it without bloom, because bloom makes it fuzzy and fake looking, which is simply not acceptable. It's one of the toughest aspects of editing. #keepitrealkids
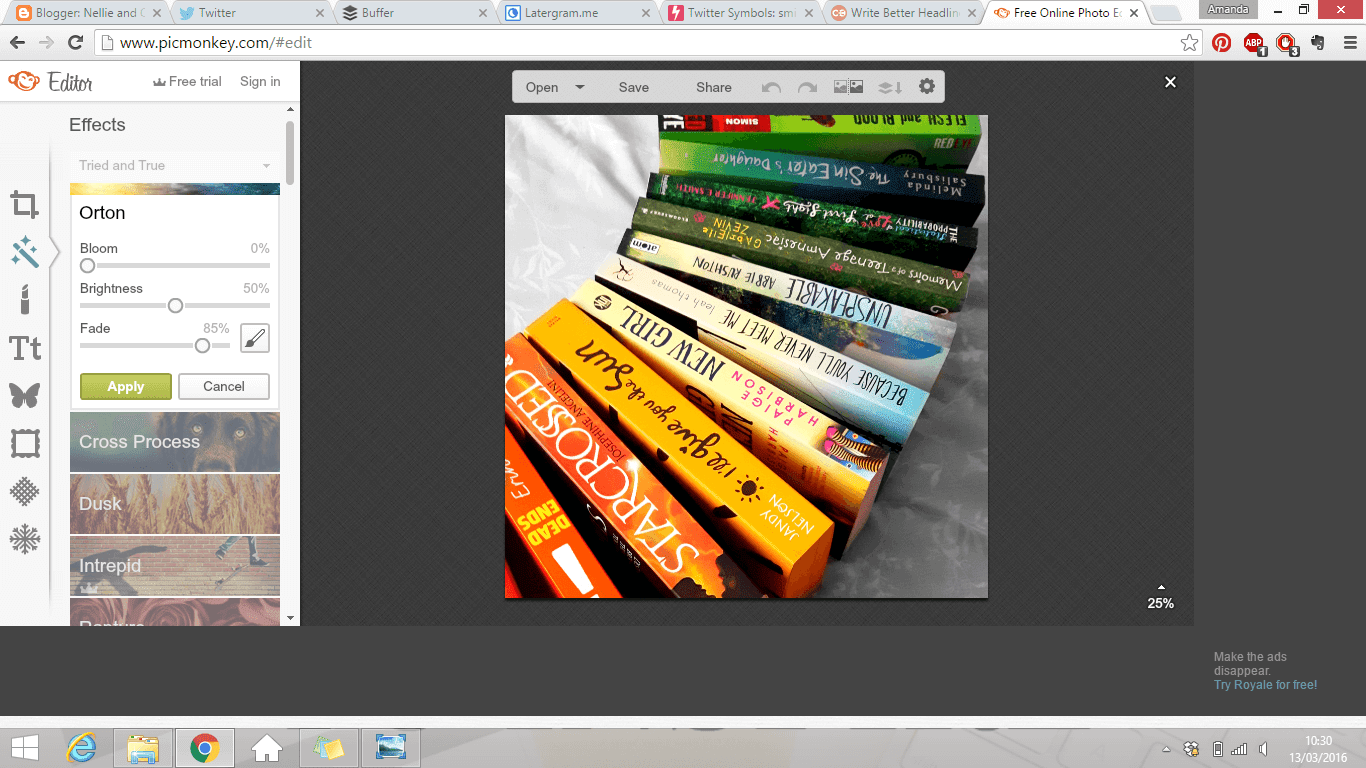
Without the bloom, I find Orton brings out the depth of the shadows, the vibrancy, and the crispness of the image more, but I always fade it down to around 70-85% because too much of a good thing is still not good, okay? I do know that it doesn't make a huge difference, but it makes some, and that matters to me.
Step Five: Sharpen Those Edges
As with every image, the more you edit, resize, rotate, or generally make changes to it, the more it loses it's sharpness, no matter how good your photo was to begin with. For this reason, it's a good practice to sharpen your image afterwards. I like to go for 10 and leave clarity where the hell it is, because as knowledgeable and experience as I look and sound, I don't have a clue what it means. *hides in shame*
And that's it. It's as easy and quick and simple as that. Editing photos has become one of my favourite hobbies now, and sometimes, I enjoy it even more than actually writing the content that they accompany. I will on most occasions edit a photo further through Instagram should I post it there with Hudson, either 50% or 100%, but almost all my editing is done outside of Instagram, so don't be afraid to upload them elsewhere, invest in some editing software away from Instagram, some of which Josephine shared her thoughts on a few weeks ago over here.
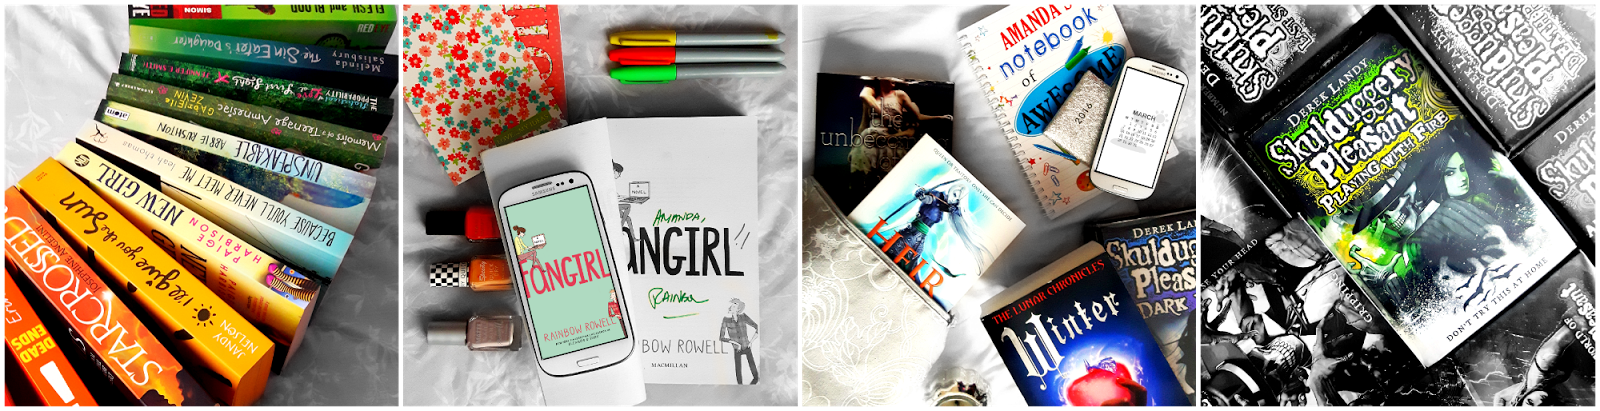
Editing photos doesn't have to be complicated, and you don't need all the fancy tools and cameras and the perfect lighting, but knowing your way around your favoruite editing program and what works and what doesn't can really get you places. You can check out more of my edited photography over in Instagram.
Um, this is SO. HELPFUL. I use Picmonkey for all edits too. And my mind is basically blown by the differences in your pictures. FIrst- I had NO idea that you had to sharpen AFTER! I would try to do it in the beginning, and it made no real difference- now I know why. And I was cropping last too, which is probably a bad idea. I love Orton too- and also reduce the bloom for the same reason :) But I think your tips are really going to help me- especially because I know what the basic functions DO, I just was using them incorrectly! This will be a GREAT fix for me, and one that doesn't require much-if any- additional work! THANK YOU for this post!
ReplyDeleteOh yes, sharpening after is THE thing to do because you've thrown edits at it left, right and center and it needs to crispen up again, so that's important. I always crop first because I find it's easy to get the focus on my image straight off, so I can direct the colours how I want them. There's nothing worse than getting the books right the background being bright red..
DeleteI think it just takes a lot of experimenting until you reach YOUR editing process. It's take me years to get mine together, but now I have it, I NEVER deviate, and it'll reach that point for you too Shannon. Just keep experimenting and trying things until it works :)
This is so helpful! I edit all my photos on my blog using Picmonkey, so this helps me so much. To find what I usually use, I just played around with all the different settings until I found something I liked. I think I might go a bit heavy on the saturation though! I'll have to try out some of these!
ReplyDeleteI don't use a white background - I use a multicoloured scarf, so I don't know if changing the background colour like you said would work. I like the idea of the contrast between the books and the background though - it makes your pictures really stand out!
Thank you SO MUCH for this! It really helped me out :D
Denise | The Bibliolater
So pleased you found this all really helpful Denise. I'm always playing with my editing, so it's always subject to some changing, so don't worry if you haven't got it bang on just yet. My background trick is entirely personal, and it's up to you how you do yours, so don't worry about being different, it's your style! :)
DeleteThis is an awesome how-to! I use Picmonkey to crop photos I already edited on my phone with VSCOcam but that process takes millions of years and it's just SO tedious. I'm gonna take inspiration from this post and play around with Picmonkey for a bit and see how it goes. VSCO is basically the only editing app I use because I love the filters on it.
ReplyDeleteThanks Kaylie! I find that when I use Picmonkey with Latergram.me my whole process is super quick and it's done in a doddle, so seirously give a go and play around a little, see what happens :D
Delete